How to install BCMS on DigitalOcean in 5 minutes
BCMS requires a server to run. In this guide, you'll learn how to set it up on a DigitalOcean droplet.
Prerequests
Below is the list of recommended and minimum hardware specifications to successfully run BCMS.
Recommended specification
Minimum specification
If you are going to use BCMS only for reading and writing data, minimum requirements are enough.
Otherwise, if you are going to use BCMS' server-side image processing or CPU and RAM-intensive plugins - recommended configuration is, well - recommended :)
Existing server
You already have a server. Can you use it for BCMS?
Even though it is technically possible, it's highly recommended to runn BCMS on its own server instance because:
- It is more secure - Having only BCMS on the server ensures the isolation of the application, and makes it more secure. If you are running BCMS on the server with other applications, those applications can compromise BCMS, and if BCMS is compromised, it can compromise other applications.
- It is more stable - If BCMS is the only application running on the server, other applications cannot impact the performance or crash the server.
- It is easier - BCMS provides tools that update and configure your server to run BCMS smoothly. This includes File System, proxy, database, and security. All default configuration options can be used if the server is dedicated to BCMS.
In the next sections, you'll learn how to set up BCMS on its own server.
Running BCMS on DigitalOcean
DigitalOcean is a user-friendly cloud hosting provider with a transparent and predictable pricing model. It's an excellent option for businesses of different sizes, and our recommedation :)
Creating a Droplet
First, go to DigitalOcean and log in to your account. After that, you can go to Create Droplet screen.
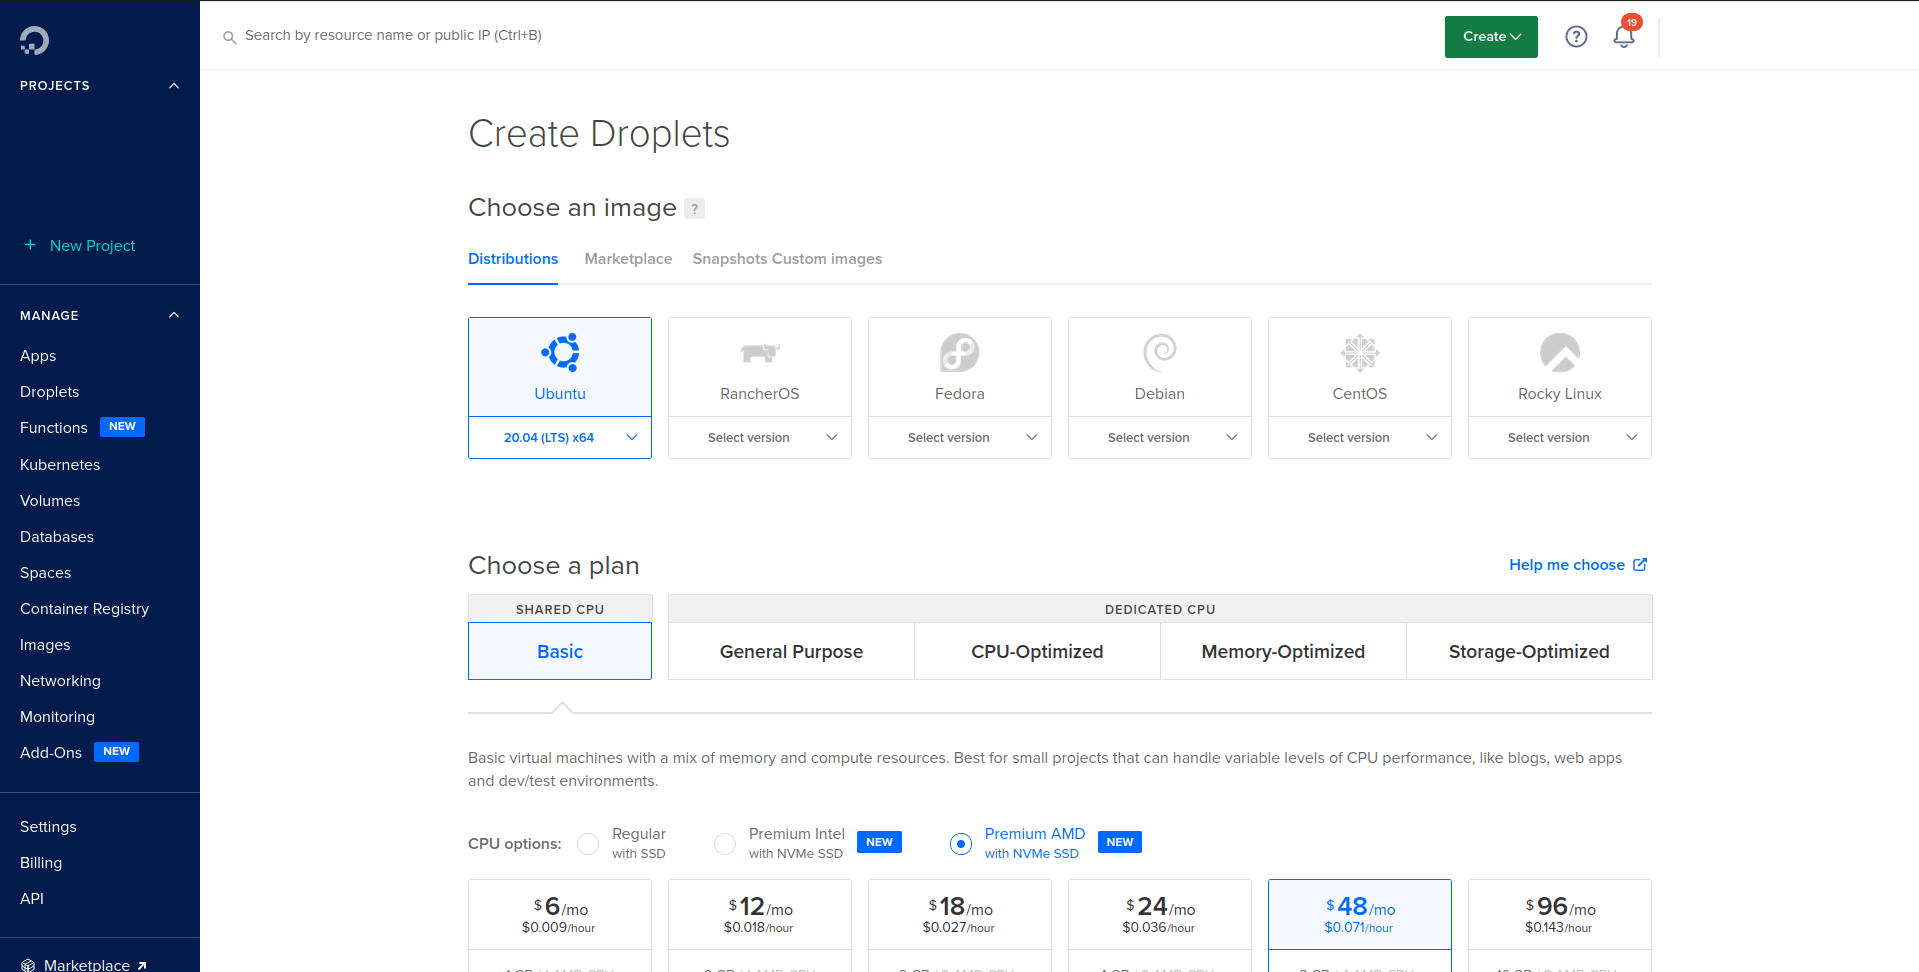
In Choose an image section, select Ubuntu.
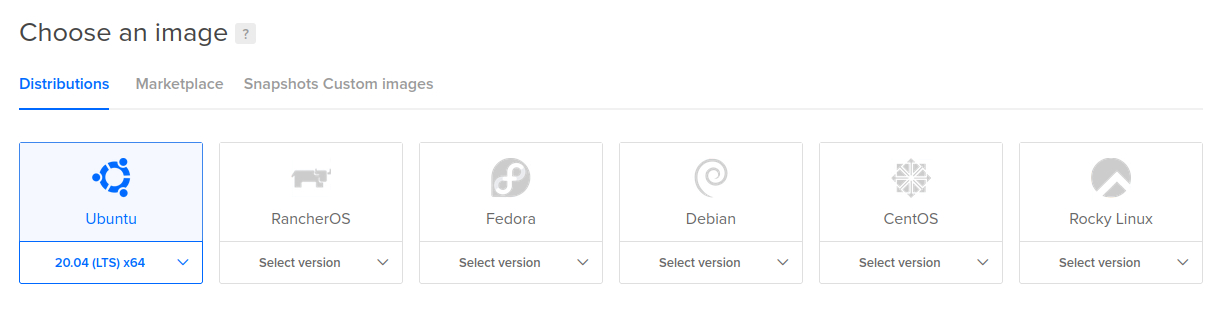
In Choose a plan section, you should select a Basic plan with Regular SSD and recommended hardware specification, which, at the time of writing these instructions, is a $20 /month plan. Please keep in mind that this is a recommended setup, and you can select any plan you like.
You can skip Add block storage section.
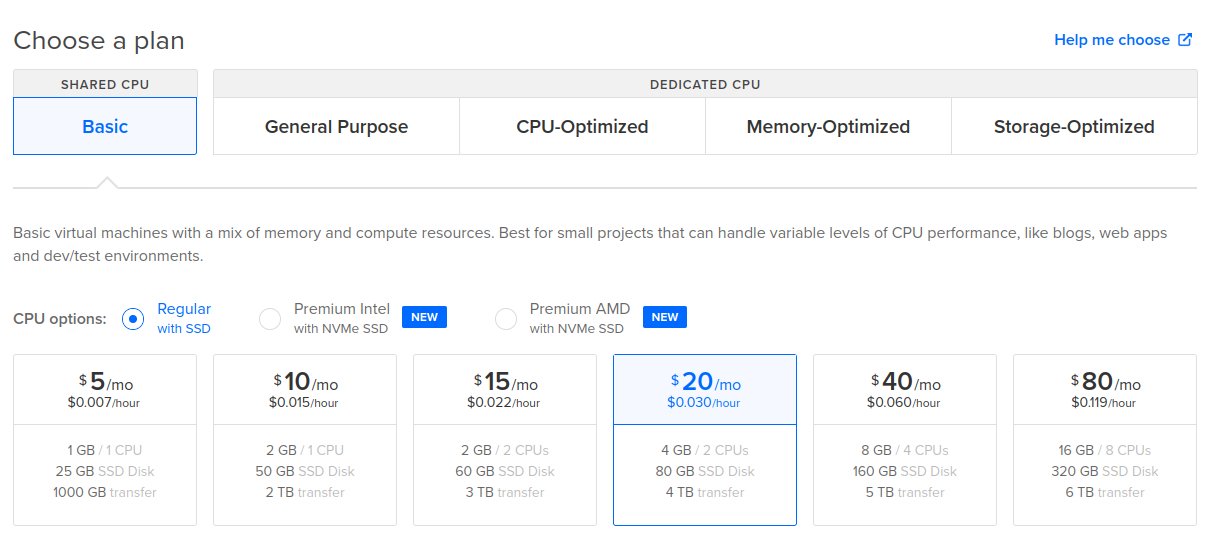
In Choose a datacenter region section, you can select any region. Try selecting a region that's physically close to your location.
The next section is a VPC Network. If you don't know what this is, leave the default settings.
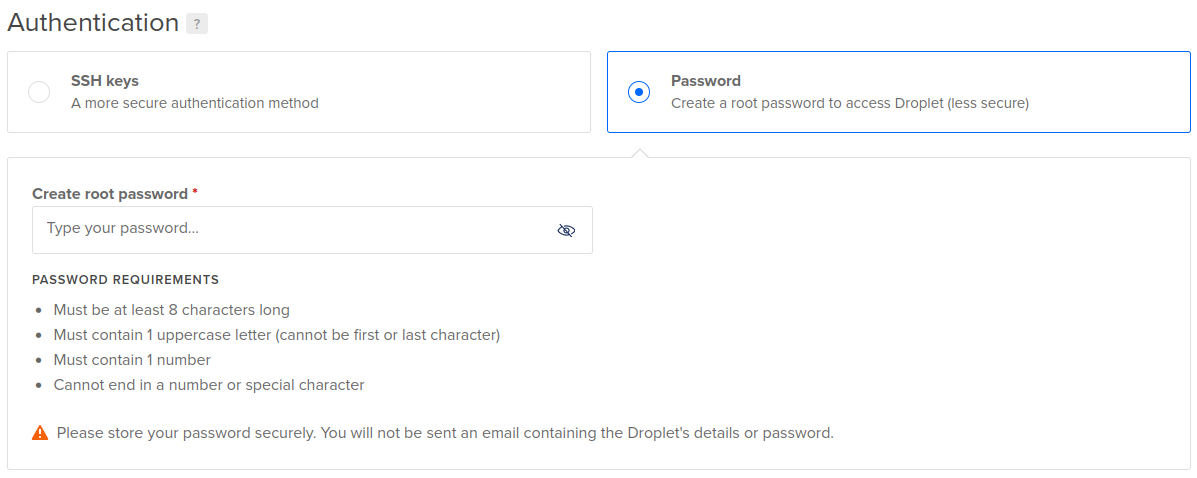
In the Authorization section, you have the option to use the SSH Key or Password to login into a server. If you don't know the SSH Key, select a password login and type a strong password.
In Finalize and create section, create only 1 Droplet and set its name to anything you like.

With all of this done, you can click on Create Droplet button.
Droplet Firewall
Setting up a firewall is optional, but recommended. Once your Droplet is created and ready, it will appear on the Droplet screen of the DigitalOcean Dashboard.
In the sidebar, click on Networking, and then click on the Edit button in the Firewalls section.
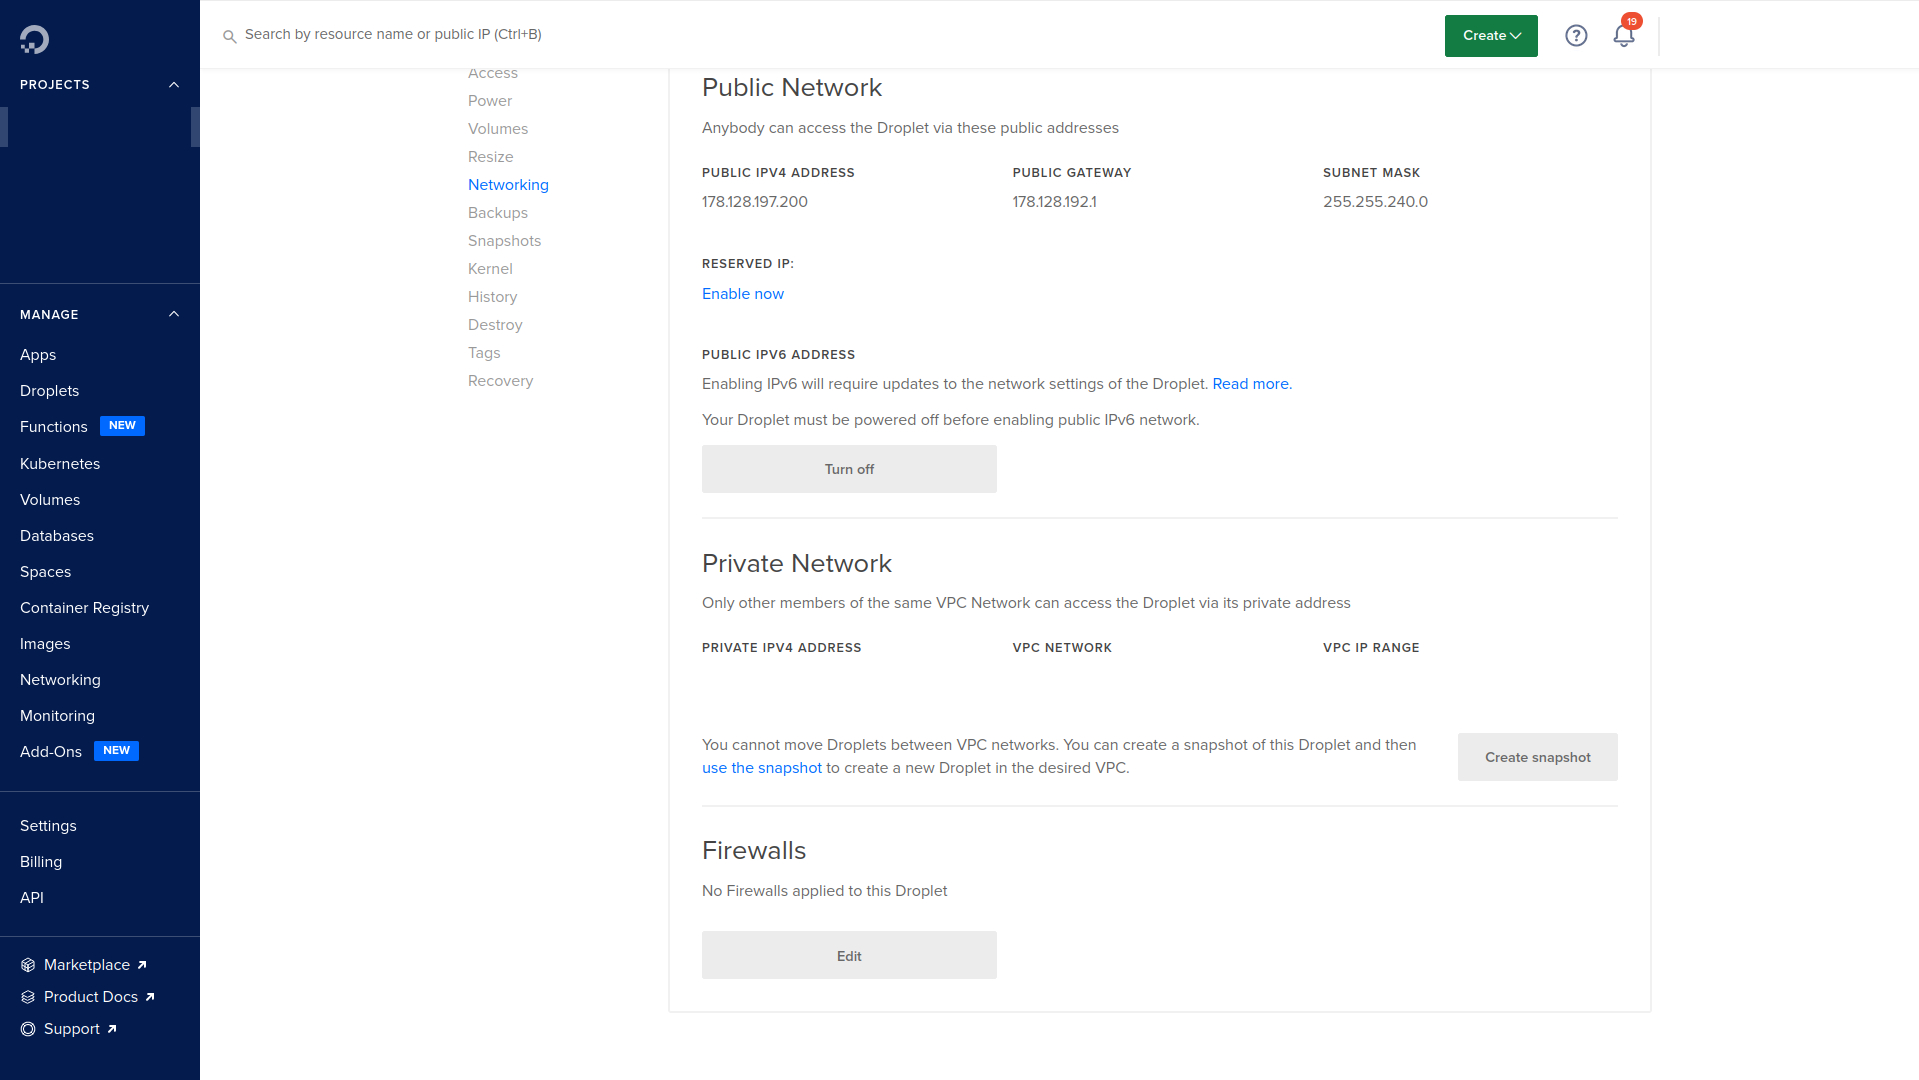
You will be redirected to the network configuration settings screen, and here you can click on Create Firewall button. After this, you will be redirected to the Firewall configuration screen.
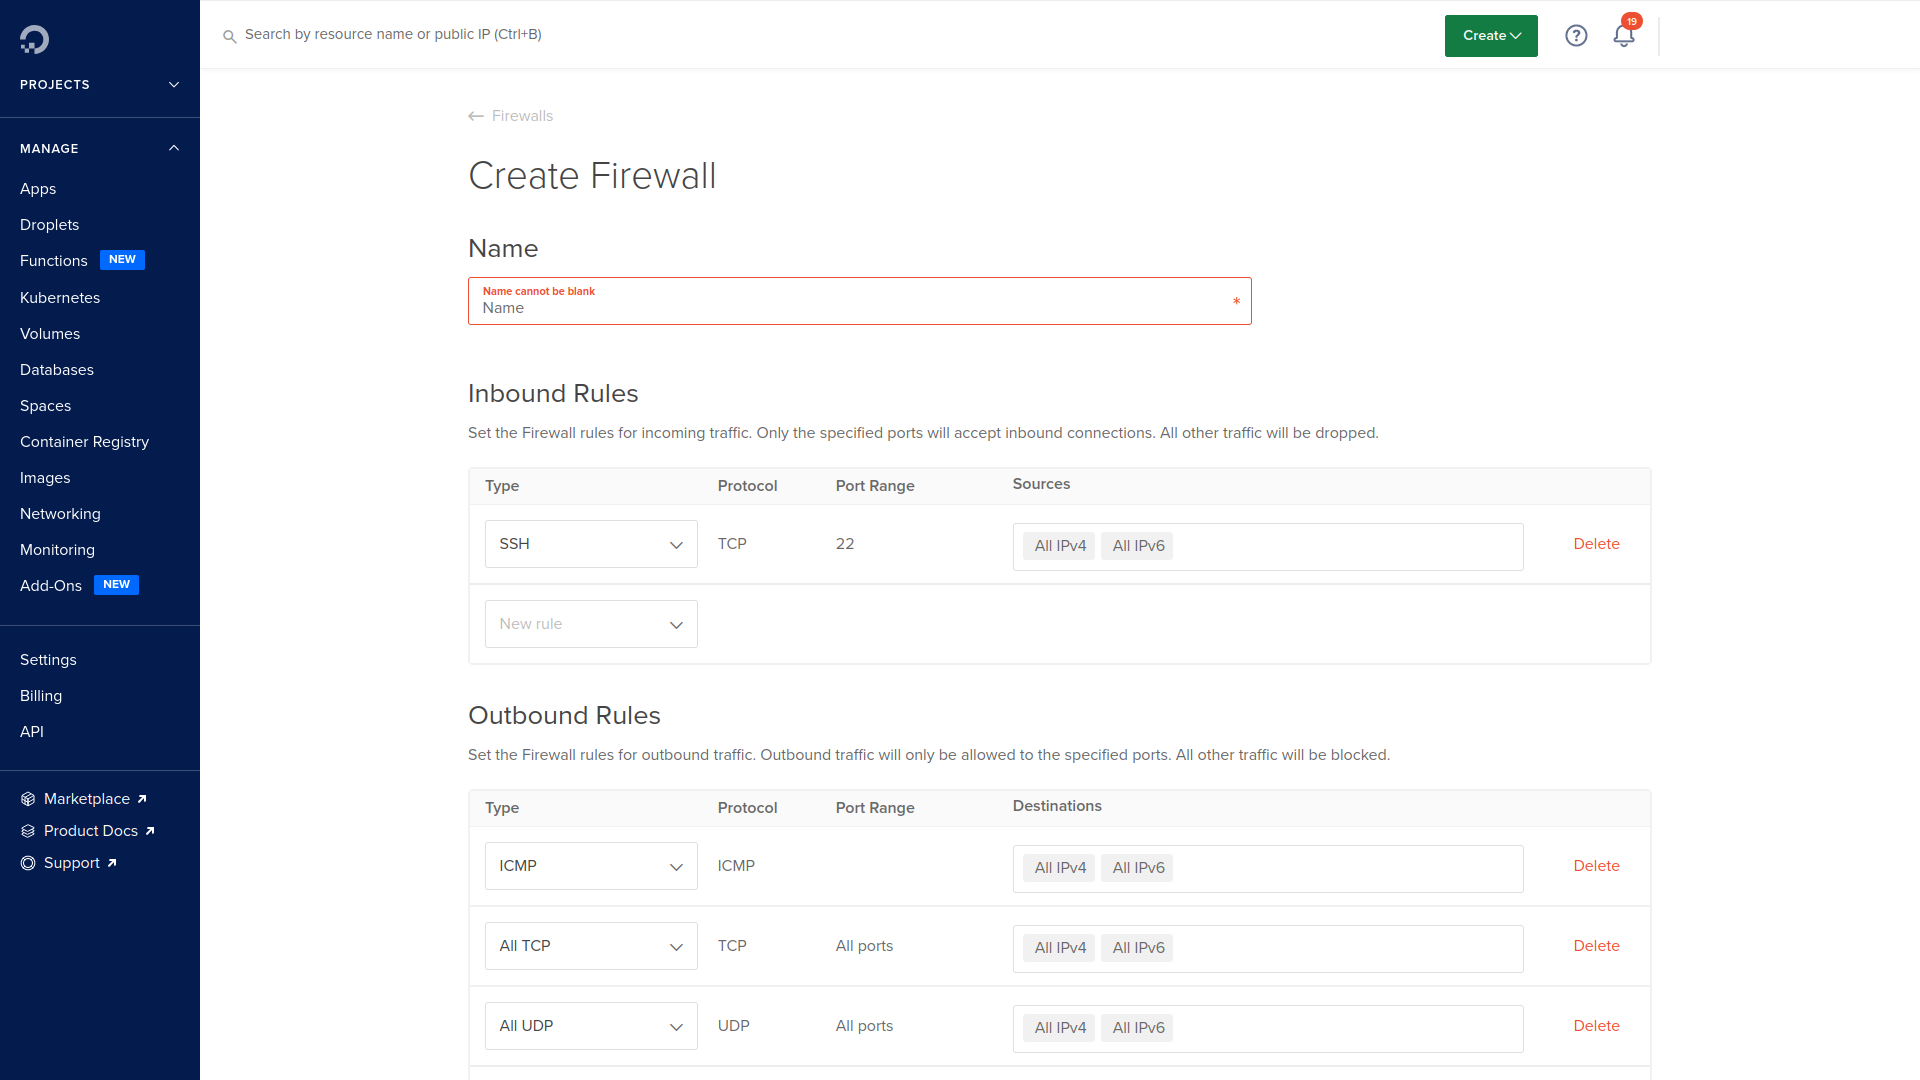
First, you will need to enter the firewall name. Use bcms-firewall as a name, so that you know it's purpose later.

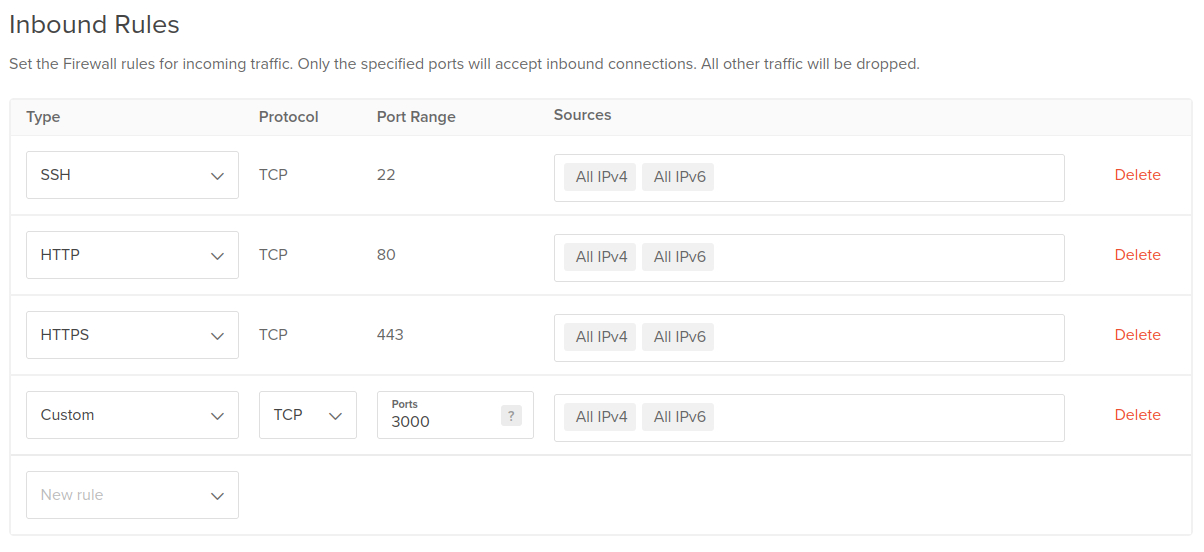
After that, set the incoming connection rules as shown below. Remember that for SSH connections, you can set a specific IP address that can use it, but if you do not know what this is or if you do not have a static IP address, leave it as shown below.
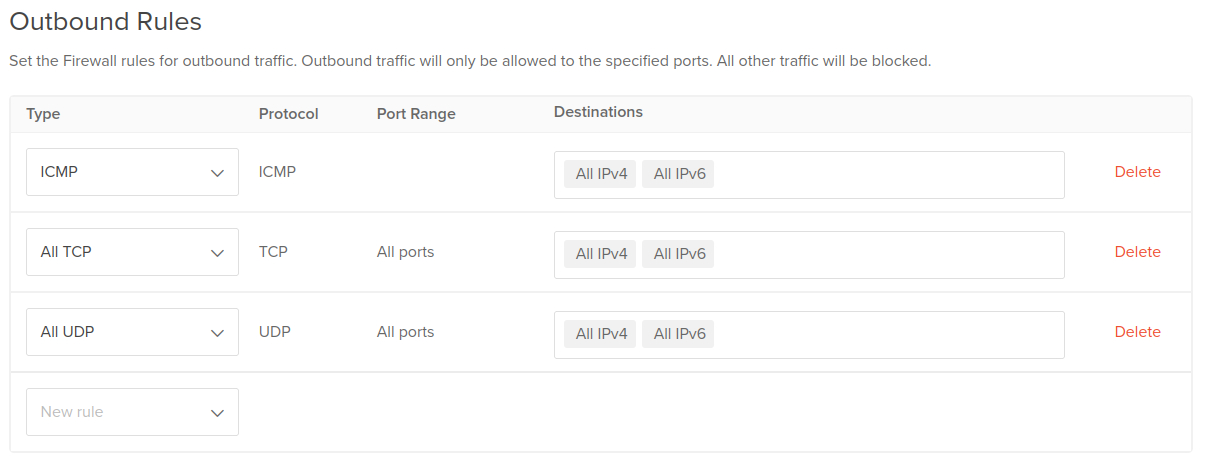
Outgoing connection rules can be left without changing them, as shown below.
The only thing left is to apply the firewall to BCMS Droplet. You can do this by typing a Droplet name (in this case, it is my-bcms-server) in Apply to Droplets section.

You can now click on Create Firewall button at the end of the page.
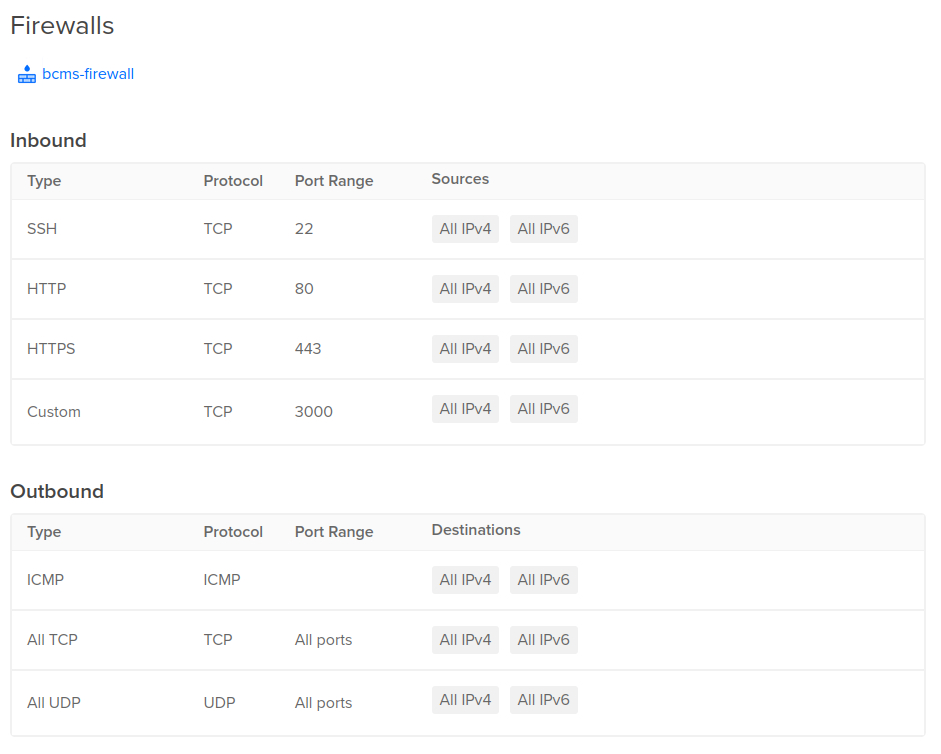
If you go back to the Droplet screen and navigate the networking tab, you will see that the firewall you just created is applied to the Droplet.
Now you are ready to login into our server.
Login into the Droplet
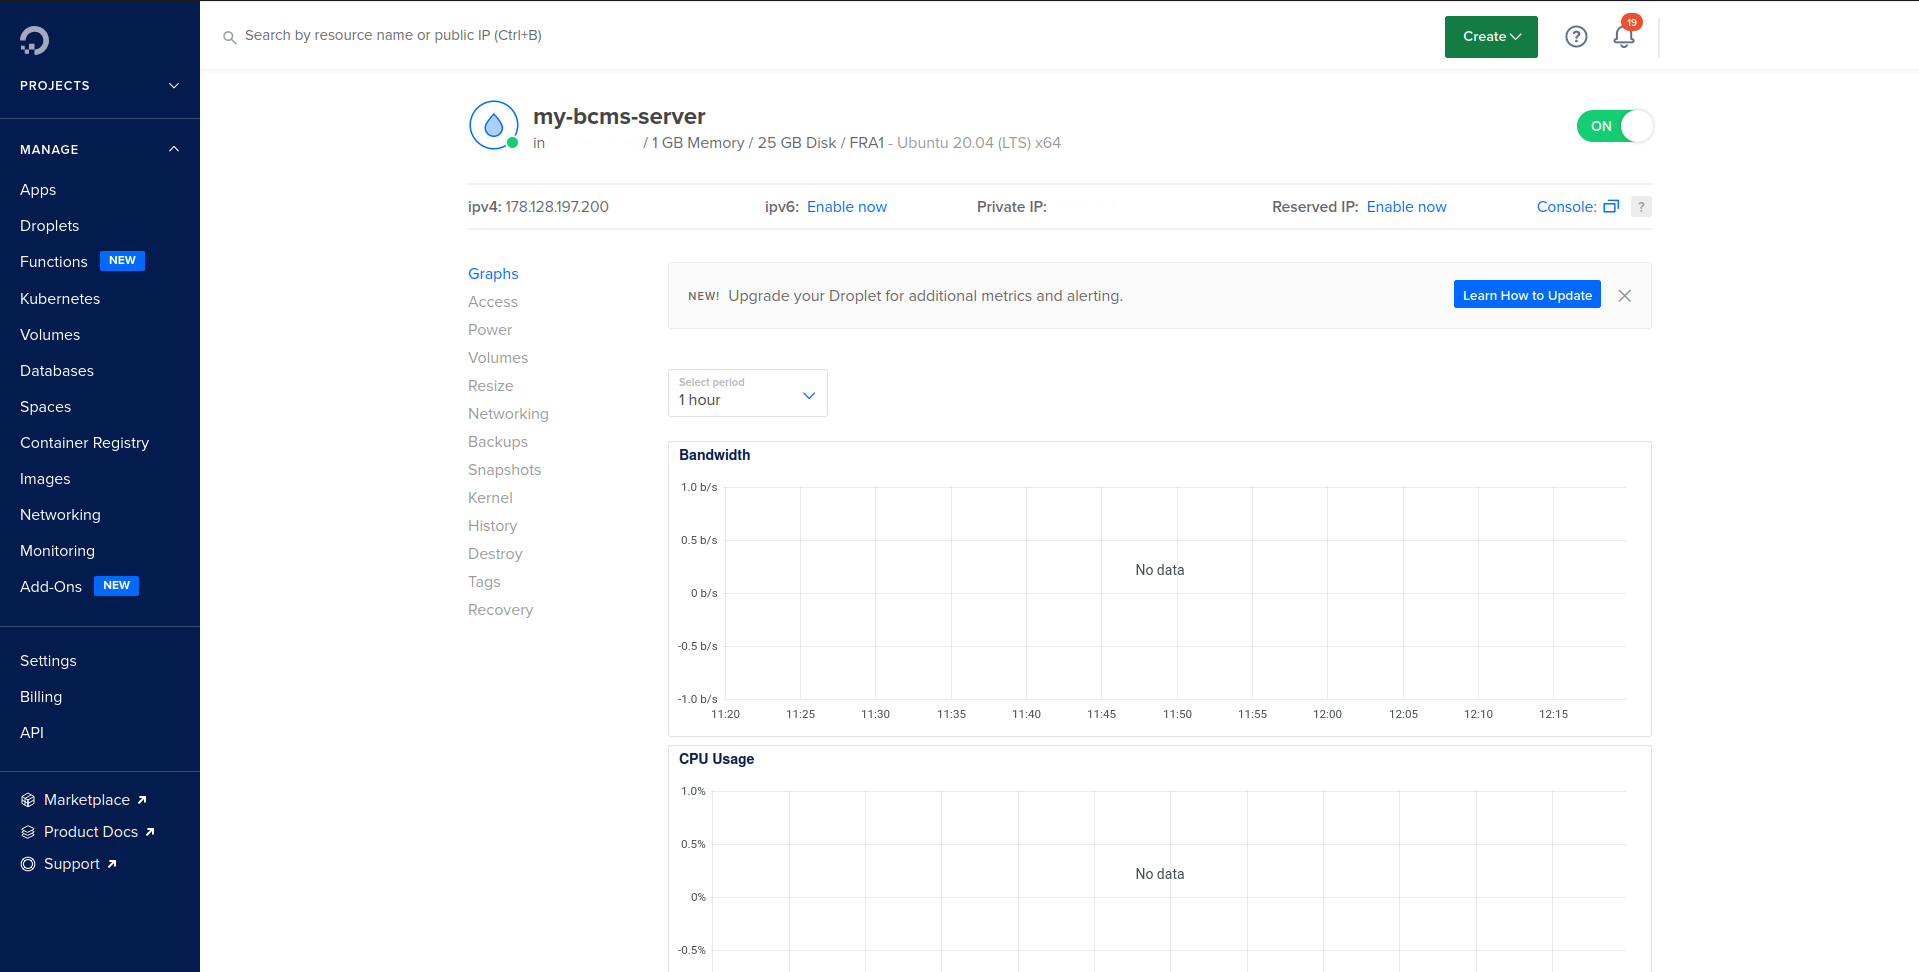
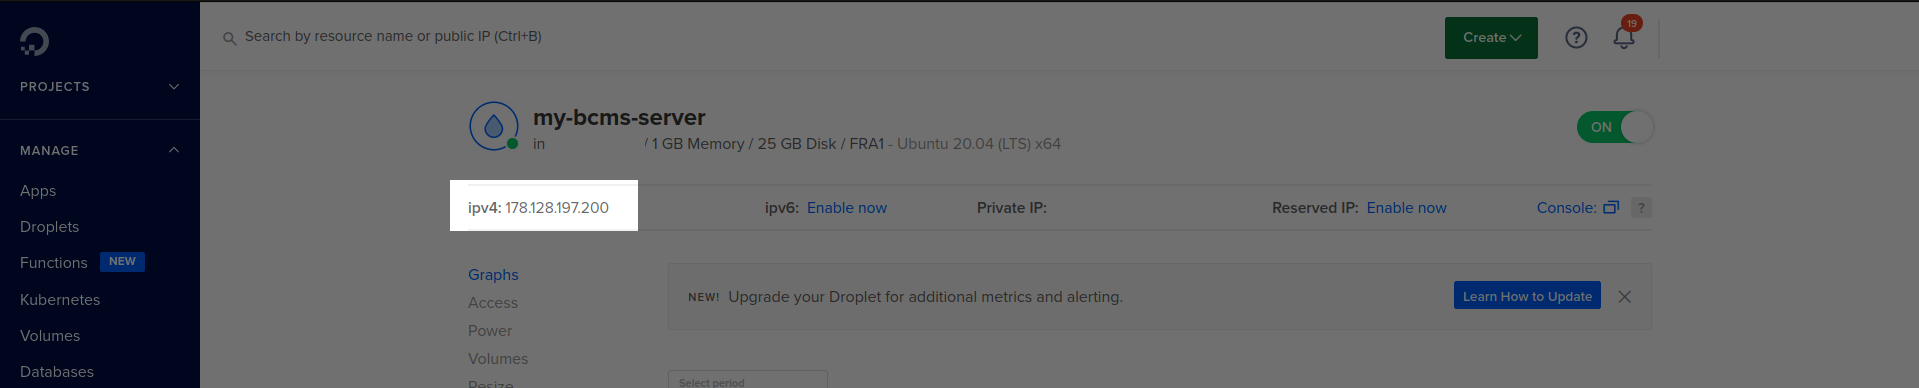
The first step is to get the IP address of the server. You can find this information on the Droplet screen, as shown below.
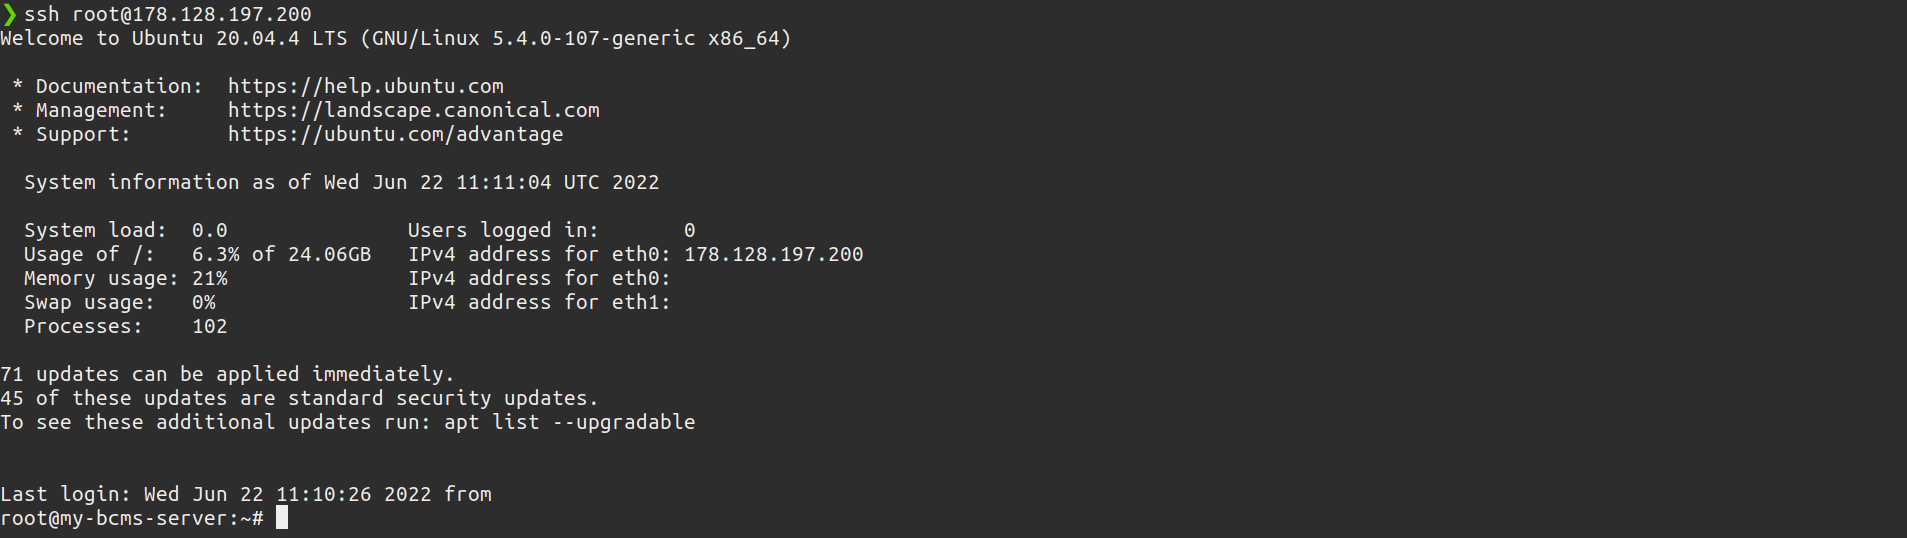
After this, open a terminal of the command line and type ssh root@IP_ADDRESS but make sure to replace IP_ADDRESS with numbers you have copied from the DigitalOcean dashboard. In our case, this command will look like this:
ssh [email protected].

If you have selected password authentication (the one you created for the Droplet), you will be prompted to enter the password.
After successful login, you will see a message shown below.
Installing BCMS on the Droplet
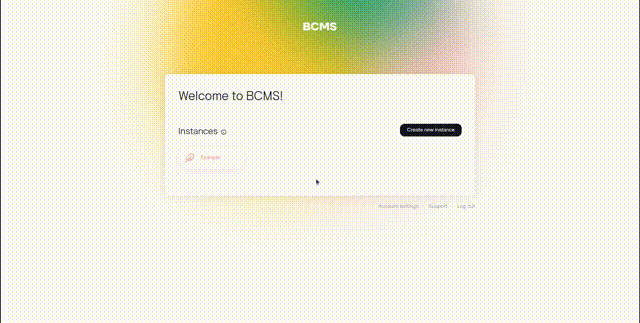
BCMS is installed using a single command. Go to your BCMS Cloud Dashboard and open the instance your would like to install. For instance, page click on More Info which will open a modal. Here you can see the installation command, as shown below.
Copy the command and return to the terminal/cmd where you are logged in to the server. Paste the command and run it. This command will install all necessary tools, update your server and install BCMS.
Aaaaaand, that's it. You now have a fully working BCMS instance! 👏