Getting started with Gatsby.js and BCMS
This is the guide for connecting Gatsby.js and BCMS. This article will teach you all the basics to begin working with BCMS and Gatsby.js.
Starting a Gatsby.js project from scratch
If you are starting a Gatsby.js project from scratch, and want to connect it with BCMS, using BCMS CLI is a recommended way. Through an interactive terminal questionary, BCMS CLI will set the codebase up for you.
After installing BCMS CLI globally, you should be able to create a Gatsby.js project and connect it with BCMS by running: bcms --website create. Here you can read more about BCMS CLI.
After running the create command, you will be prompted to decide on a few options:
- For the project name, you can enter your project's name
- For framework - select Gatsby.js
- When asked if you want to connect to the BCMS, answer with yes. After this, you'll be able to select the BCMS to connect to. If you are using a local BCMS, select the local one. However, if you are using the live version - select Live.
- Since your Gatsby.js project needs an API key to be able to access the data from the BCMS, in the next step, you'll need to select an API key that you want to use. If you haven't created any API keys yet, CLI will automatically create one. If BCMS CLI finds any API key, it will let you select one, or create a new one.
After completing all the above steps, the CLI will initialize the project and install dependencies. Then, you can open the project in your favorite code editor and run npm run dev. Now you can navigate to localhost:3000.
Adding BCMS to an existing Gatsby.js project in 3 steps
The fastest way to use BCMS with Gatsby.js is to create a new project using BCMS CLI. But if you want to add BCMS to an existing Gatsby.js project, here are the steps:
- Install the plugin and its dependencies by running:
npm install -D gatsby-source-bcms @becomes/cms-most @becomes/cms-client - In
gatsby-config.jsadd the plugin:
gatsby-config.js
import {createBcmsMostConfig} from '@becomes/cms-most';

plugins: [
  ...
  {
    resolve: 'gatsby-source-bcms',
    options: createBcmsMostConfig({
      cms: {
        origin: process.env.BCMS_API_ORIGIN || 'https://becomes-starter-projects.yourbcms.com',
        key: {
          id: process.env.BCMS_API_KEY || '629dcd4dbcf5017354af6fe8',
          secret: process.env.BCMS_API_KEY_SECRET || '7a3c5899f211c2d988770f7561330ed8b0a4b2b5481acc2855bb720729367896'
        }
      },
      media: {
        download: false
      }
    }),
  }
]

export default Blog;
Gatsby.js & BCMS project structure
By default, BCMS CLI creates a typical Gatsby.js project. However, you might spot a few new files and folders. Here's what they are.
./gatsby-config.js- This is a typical Gatsby configuration file. But now there is BCMS plugin initialization../bcms.routes.js- Here you can define custom API routes in the Most server (by default running on localhost:3001). This is an advanced feature../gatsby-node.js- Here, you have access to the BCMS Most and can create dynamic pages.
That's all the stuff related to the BCMS. Everything else in your project's folder is the vanilla Gatsby.js.
How to get data from BCMS on a Gatsby.js page?
There are two ways you can get data from the BCMS and display it on the page. Using Gatsby GraphQL, and using Gatsby Node and BCMS Most.
Getting data on the Gatsby.js page with BCMS and GraphQL
Please keep in mind that this is just an example, and that you probably need to adapt it to your data structure.
pages/example.tsx
import { graphql } from 'gatsby';
import React, { FC } from 'react';
/**
 * These types are autogenerated by the BCMS Most.
 */
import type { PagesEntry } from '../../bcms/types-ts';

interface Ctx {
  data: {
    page: {
      bcms: PagesEntry;
    };
  };
}

const Example: FC<Ctx> = ({ data }) => {
  return (
    <pre>
      <code>{JSON.stringify(data.page.bcms, null, '  ')}</code>
    </pre>
  );
};

export default Example;

export const query = graphql`
  query {
    page: bcmsPages(bcms: { meta: { en: { slug: { eq: "example" } } } }) {
      bcms {
        content {
          en {
            value
            type
            name
            isValueObject
            attrs {
              level
            }
          }
        }
        createdAt
        userId
        updatedAt
        templateId
        status
        meta {
          en {
            title
            slug
            cover_image {
              _id
              alt_text
              width
              src
              name
              height
              caption
            }
          }
        }
      }
    }
  }
`;
Getting data on the Gatsby.js page using BCMS Most and Gatsby Node
templates/example.tsx
import React, { FC } from 'react';
/**
 * This types are autogenerated by the BCMS Most.
 */
import { PagesEntry } from '../../bcms/types-ts';

interface Props {
  pageContext: {
    page: PagesEntry;
  };
}

const Example: FC<Props> = (props) => {
  const ctx = props.pageContext;
  return (
    <pre>
      <code>{JSON.stringify(ctx.page, null, '  ')}</code>
    </pre>
  );
};

export default Example;
gatsby-node.ts
import * as path from 'path';
import { CreatePagesArgs } from 'gatsby';
import { getBcmsMost } from 'gatsby-source-bcms';

export const createPages = async (data: CreatePagesArgs) => {
  const most = getBcmsMost();
  const {
    actions: { createPage },
  } = data;

  const examplePageData = await most.content.entry.findOne(
    'pages',
    async (item) => item.meta.en.slug === 'example',
  );
  createPage({
    component: path.resolve('src/templates/example.tsx'),
    path: '/example',
    context: {
      page: examplePageData,
    },
  });
};
What's the difference between getting data using GraphQL and BCMS Most
In hort, it comes down to the developer's personal preference.
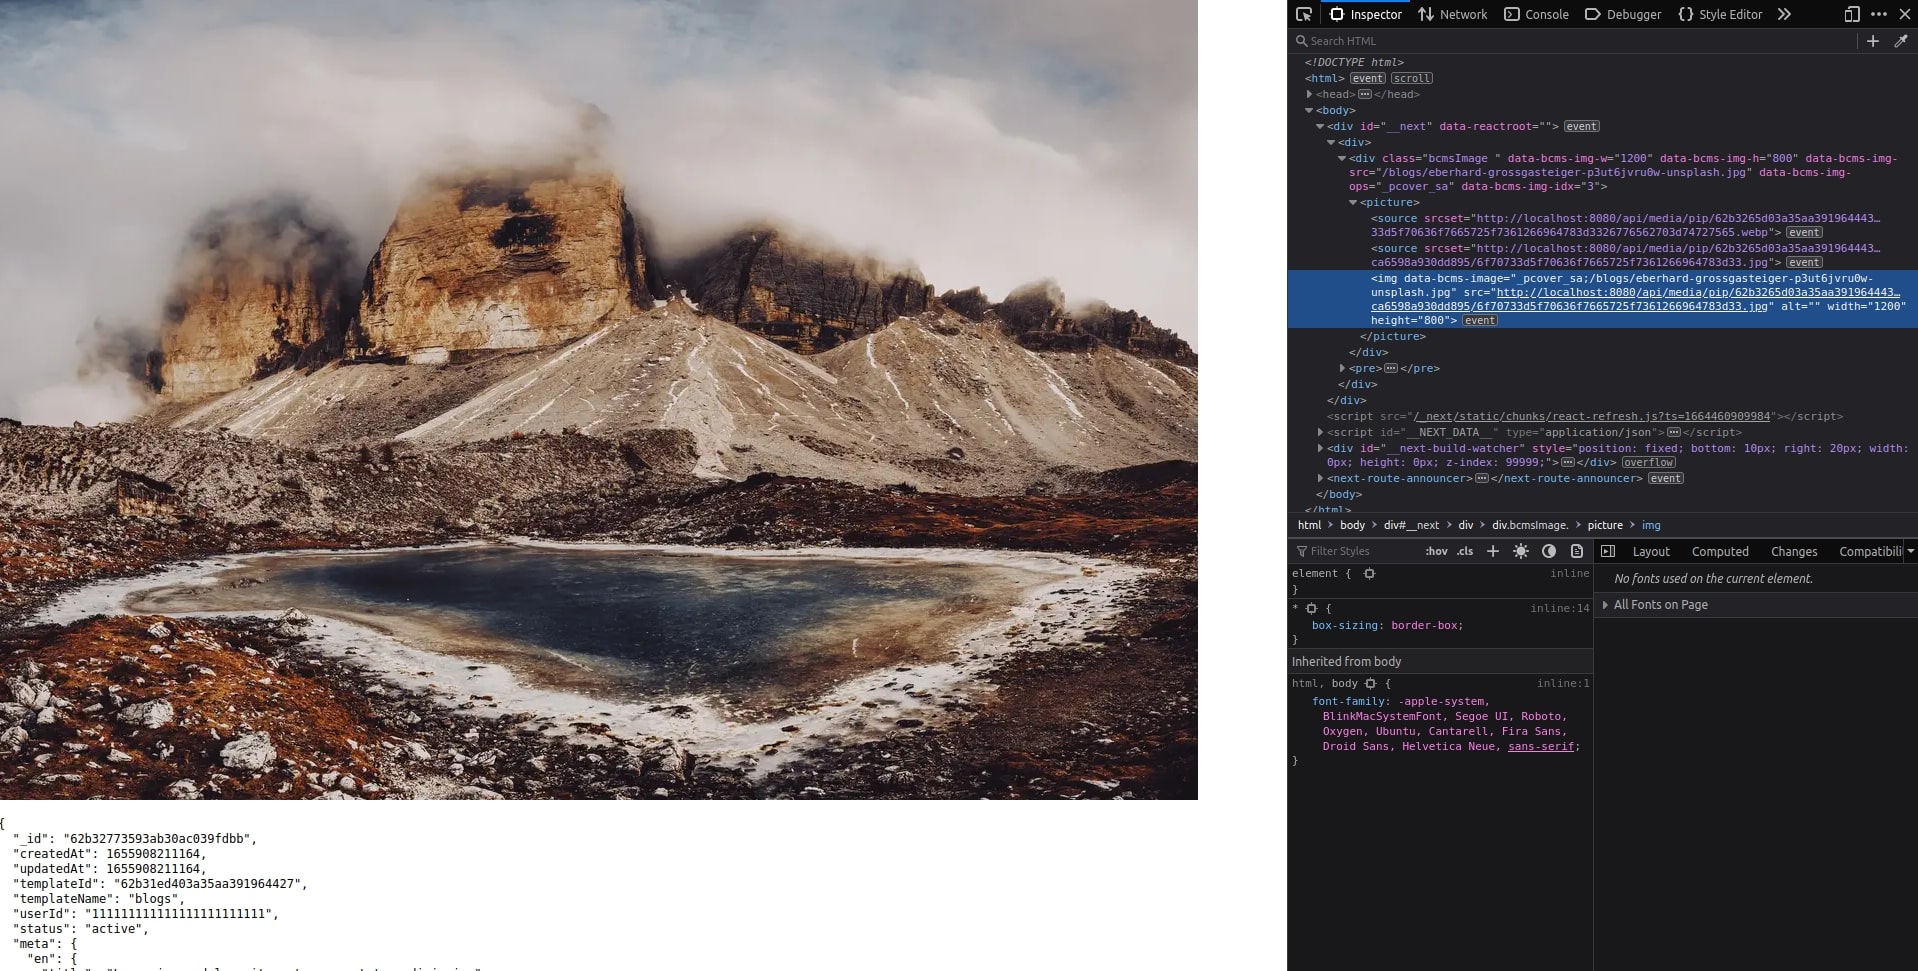
Working with BCMSImage Gatsby.js component
Usually, websites have a lot of images for blogs, banners, posts, users, and animations... To simplify handling responsive images and performance optimization, BCMS comes with the BCMSImage component.
BCMSImage is a powerful component, super easy to use. BCMSImage automatically creates multiple variants of the source image, including WEBP format. See how to use BCMSImage and what you can do with it:
To start, import BCMSImage component, and pass an object from BCMS, containing an image. In the example below, the prop is cover_image object.
return (
  <Layout>
    {props.entry.meta.en?.cover_image && (
      <BCMSImage media={props.entry.meta.en.cover_image} />
    )}
    <pre>
      <code>{JSON.stringify(props.entry, null, '  ')}</code>
    </pre>
  </Layout>
);
If you change the size of the viewport, you'll see that the image size is changing. It's not some CSS magic, but the real image source is changing. If you inspect the image, you'll see that the image source is the same size as it appears on the screen.
To learn more about responsive images and BCMS, read about BCMSImage component documentation.
Where to deploy Gatsby.js & BCMS code
You can deploy your BCMS-powered Gatsby application anywhere you usually deploy your Gatsby applications. Keep in mind that, to benefit from BCMS Cache, you should avoid using platforms that serve applications in the serverless technology.
Recommended platforms:
What's next
Great, you now have a fully set up Gatsby.js with BCMS. Congrats! 🎉
Now you can learn more about Widgets and Groups.